How To Place An Image In Text Using Photoshop?
Wrapping an image inside a text is well known and a popular text effect. In this tutorial am going to show you guys how it can be done through some simple steps. Here am using Photoshop cs6, but it is also compatible with higher versions of Photoshop like Photoshop CC. Wrapping image inside is done through clipping mask technique. Let’s see how it is done.
STEP 1 : Duplicate The Background Image
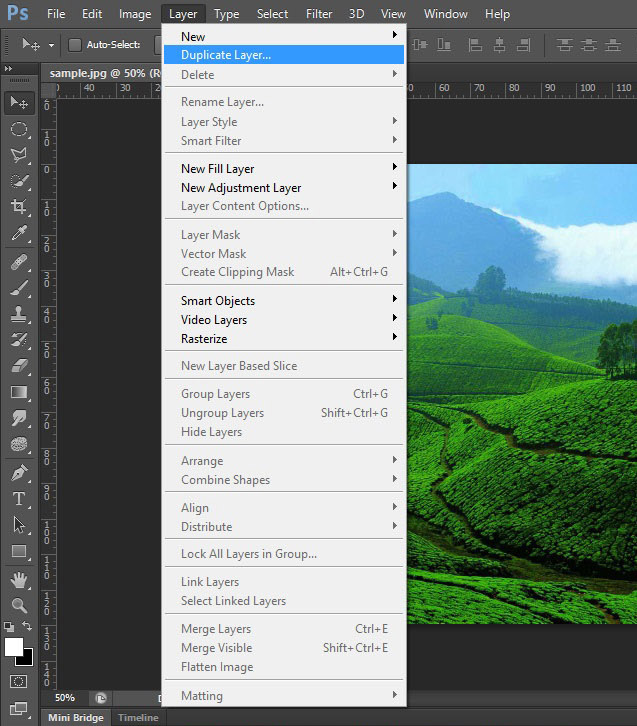
Open the required image that we want to place inside a text. Duplicate the background layer by navigating to Layer>Duplicate Layer.
STEP 2 : Add A White Solid Color Fill Layer In Between Two layers
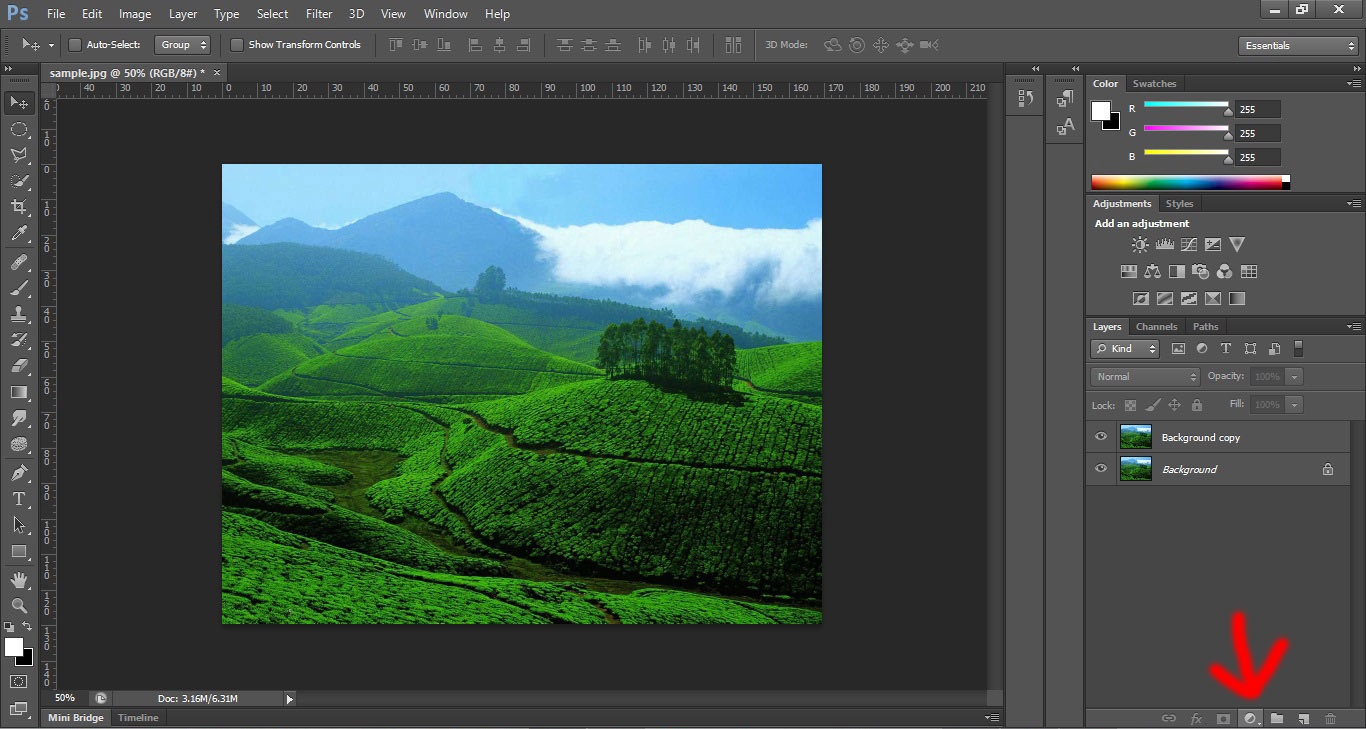
Its time to add solid color fill layer in between these two layers. Click on the icon that is indicated by red arrow.
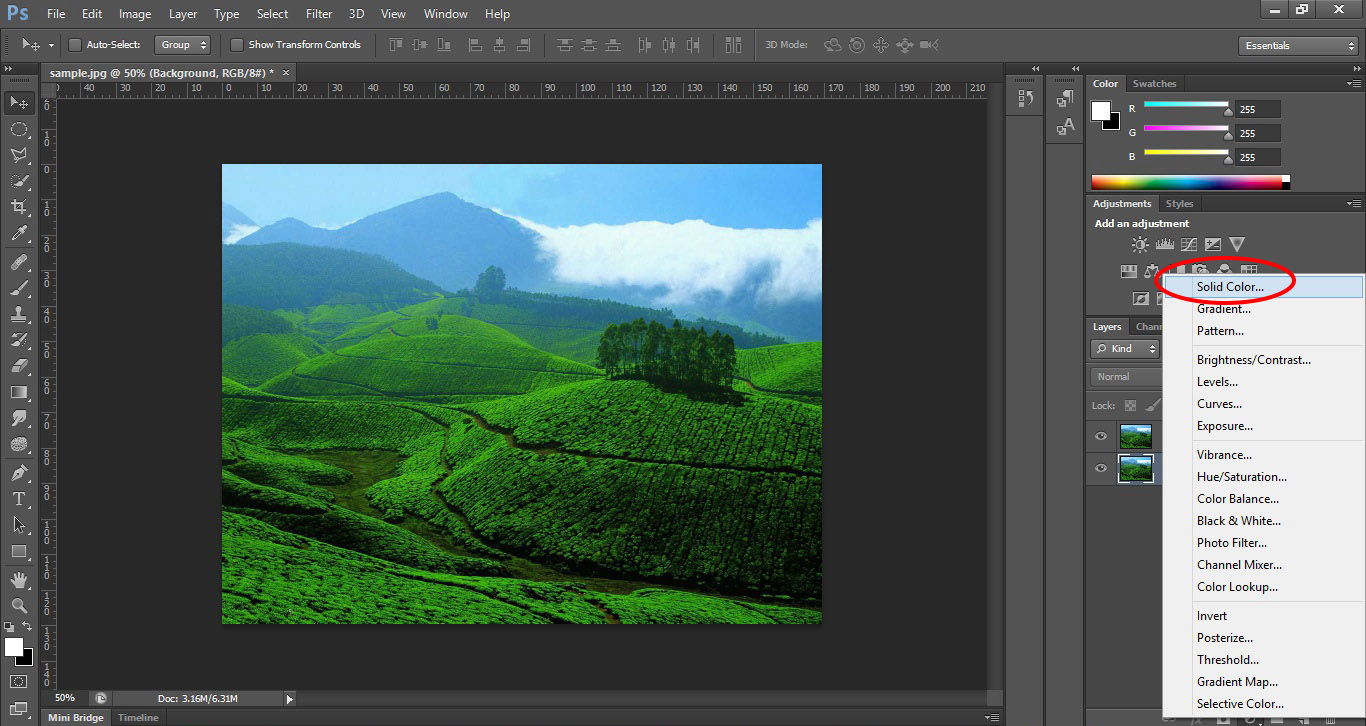
From the small menu appears select Solid color.
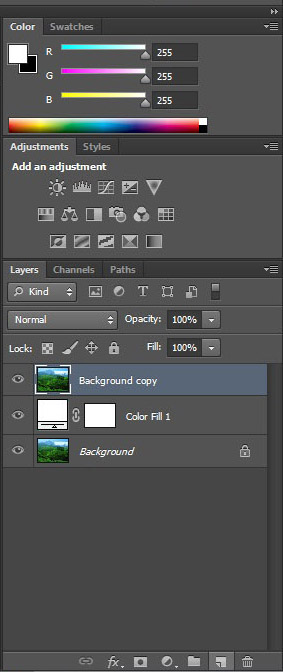
Note down the values that i used here. Its clearly makes a white color. Then select ok. Remember that the new fill layer is formed above all the layers. Drag the layer by clicking and place it in between the two layers.
STEP 3 : Add new text layer above all layers and type the required text.
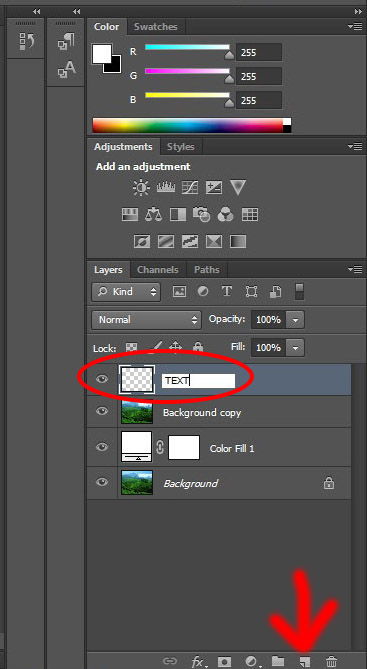
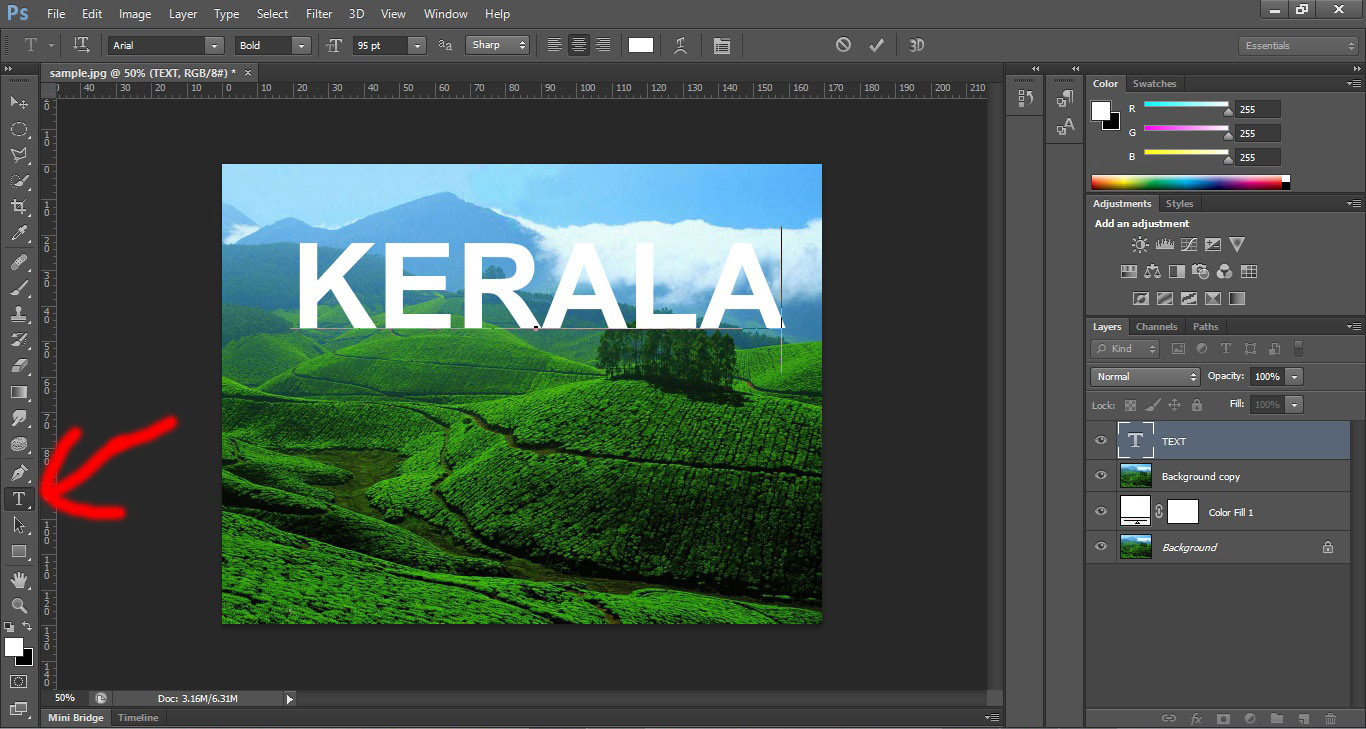
Add new text layer above the layer “background copy”. Type the text that we want to wrap a image in it. Here I typed the text “KERALA”.
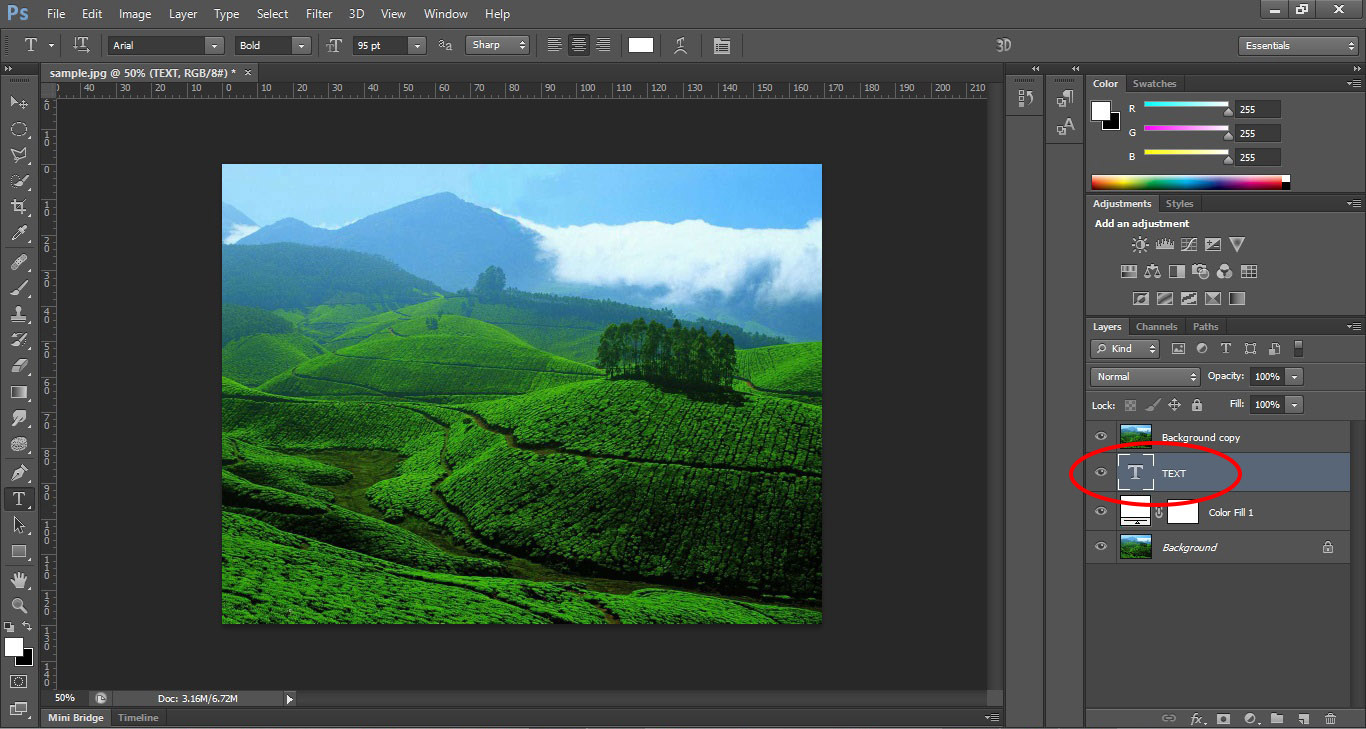
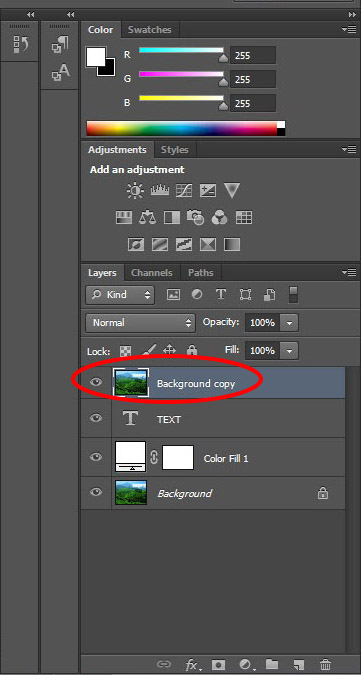
Place the text layer below “background copy’
Now we can see that the layer named ”background copy” is above all the layers. Its time to create clipping mask for that above layer. For that navigate to next step.
STEP 4 : Create Clipping Mask
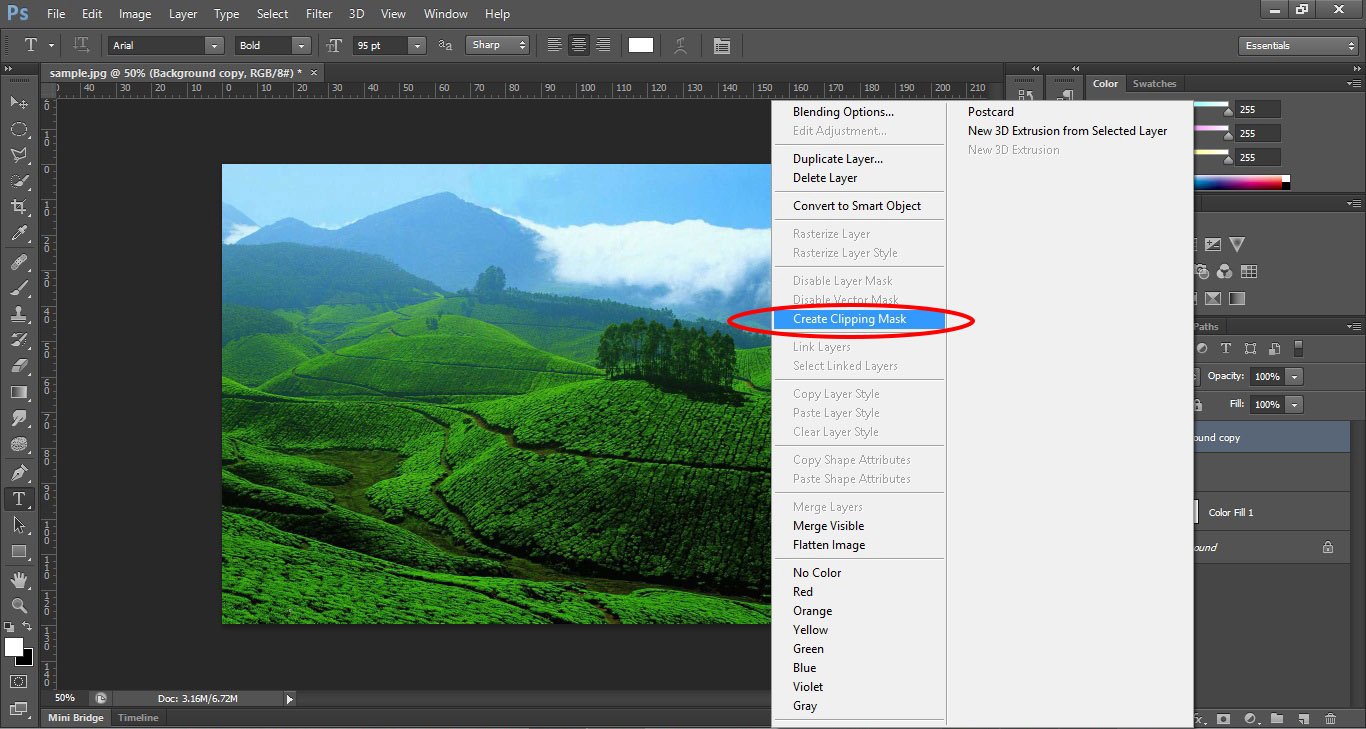
Right Click on the layer named “background copy”, then select clipping mask from the menu that appears.
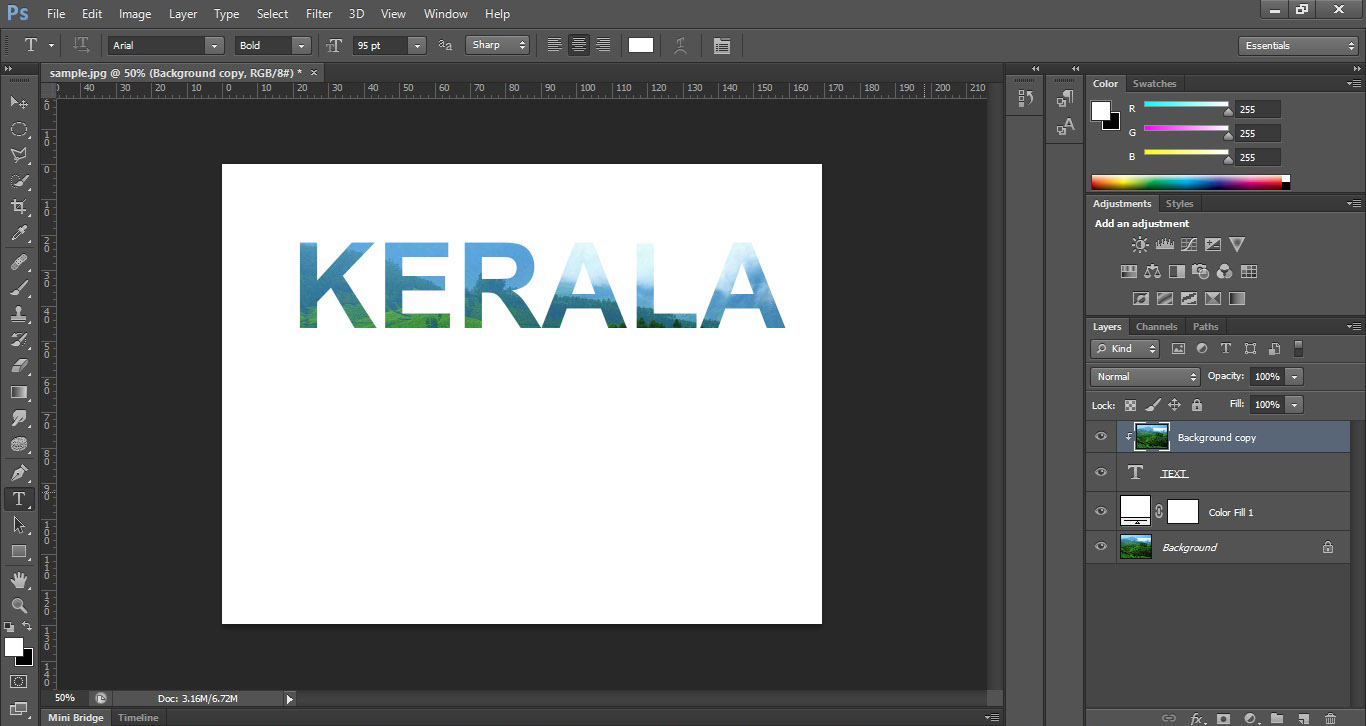
Clipping mask wrapped the image inside a text.The result will be like this. Now we can add some shadow effects to our text.
STEP 5 : Apply Drop Shadow From Blending Option
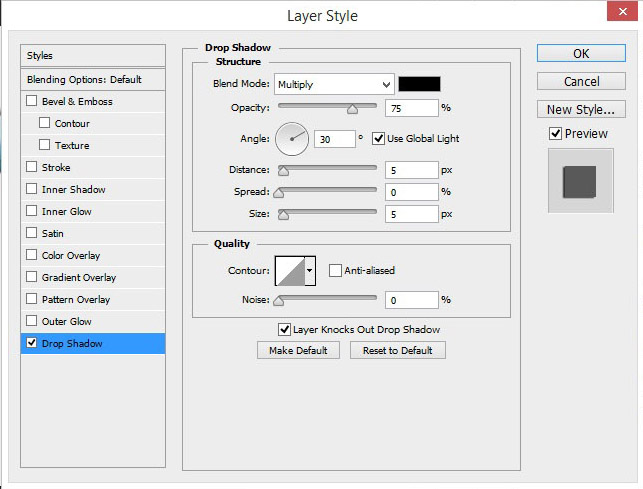
Right click on the text layer. From that take blending option then drop shadow. And alter the values for shadow.
Here i gave the shadow option only. There is so many options to stylize like stroke, glow etc..
If u meet up the desired result, click ok.
Final Result!!!!!!!!!
