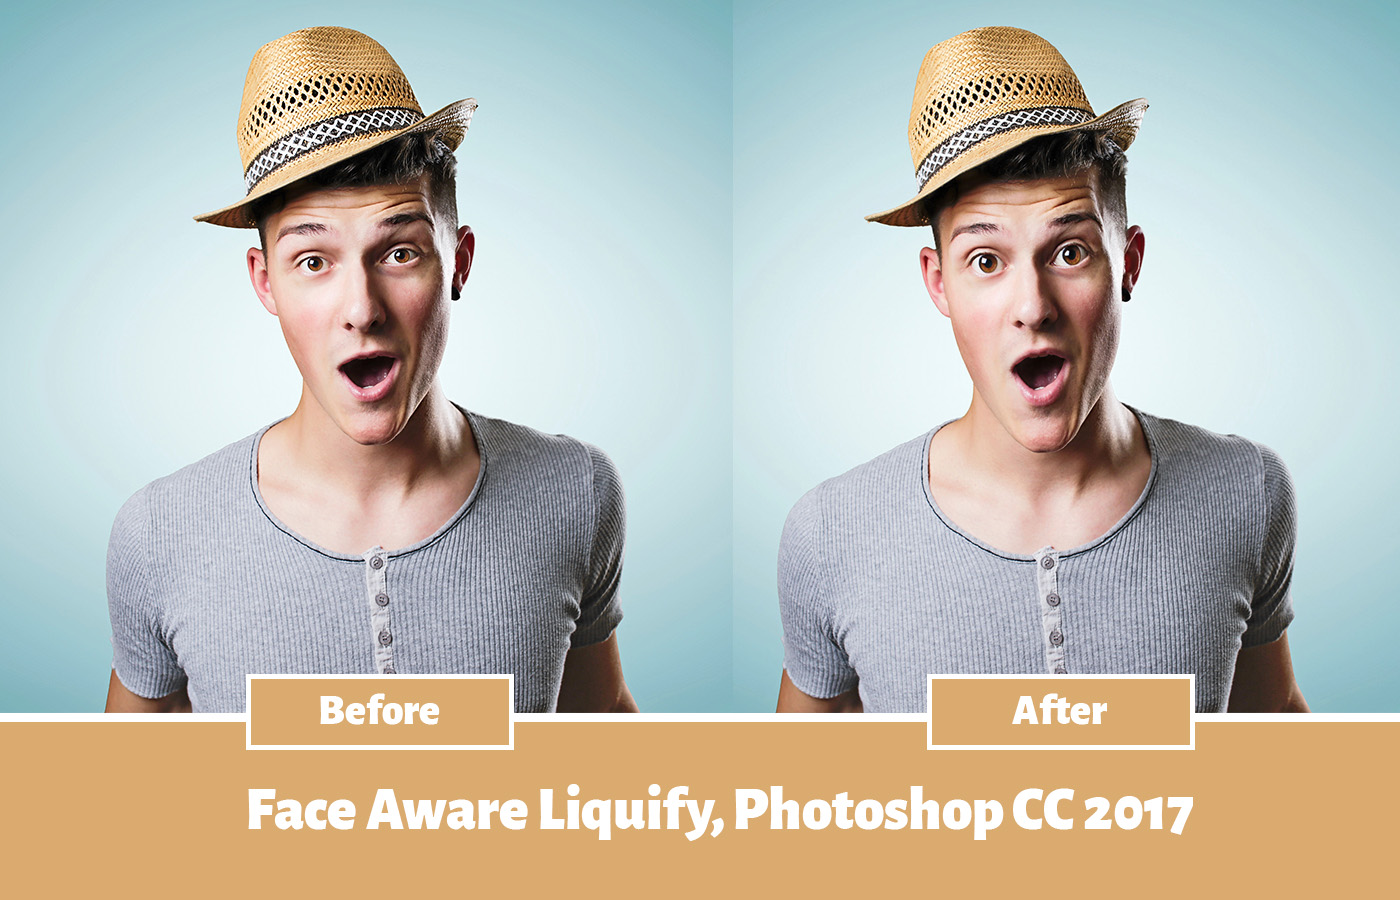
Face Aware Liquify : Meet New Addition of Photoshop CC 2017
The all new updated Photoshop comes up with the most powerful face recognition tool in the business. It is a great addition to the designer aspect which concentrates on exaggerating the facial expressions like caricatures and cartoons. The main attraction of this feature is it will automatically detect the facial features. Photoshop 2017 comes with the most powerful face recognizing and detecting algorithms. So achieving an accurate result is a guaranteed concern around here.
Step 1 : Choose an appropriate image
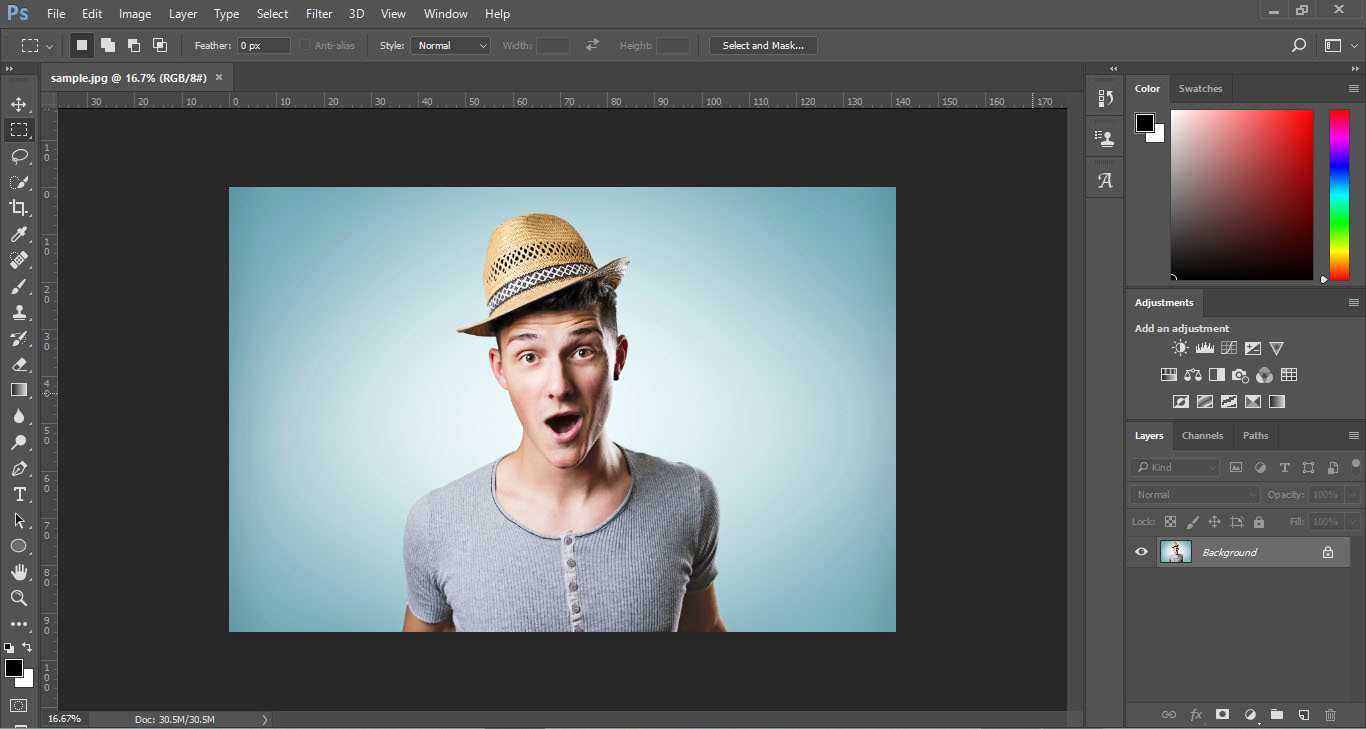
Usually face aware liquify tool is used to distort or exaggerate the facial expressions to end it like a cartoonish image or portraiture. So choosing an image is an important task here. The image more like having an expressions the task for getting a finalized result will be easier. Sample image that I used here was sourced from http://cdn2.hubspot.net/hubfs/401750/images/blog_images/150629_USA_Surprises/portrait-of-a-young-beautiful-man-surprised-face-expression-000067065271_Large.jpg
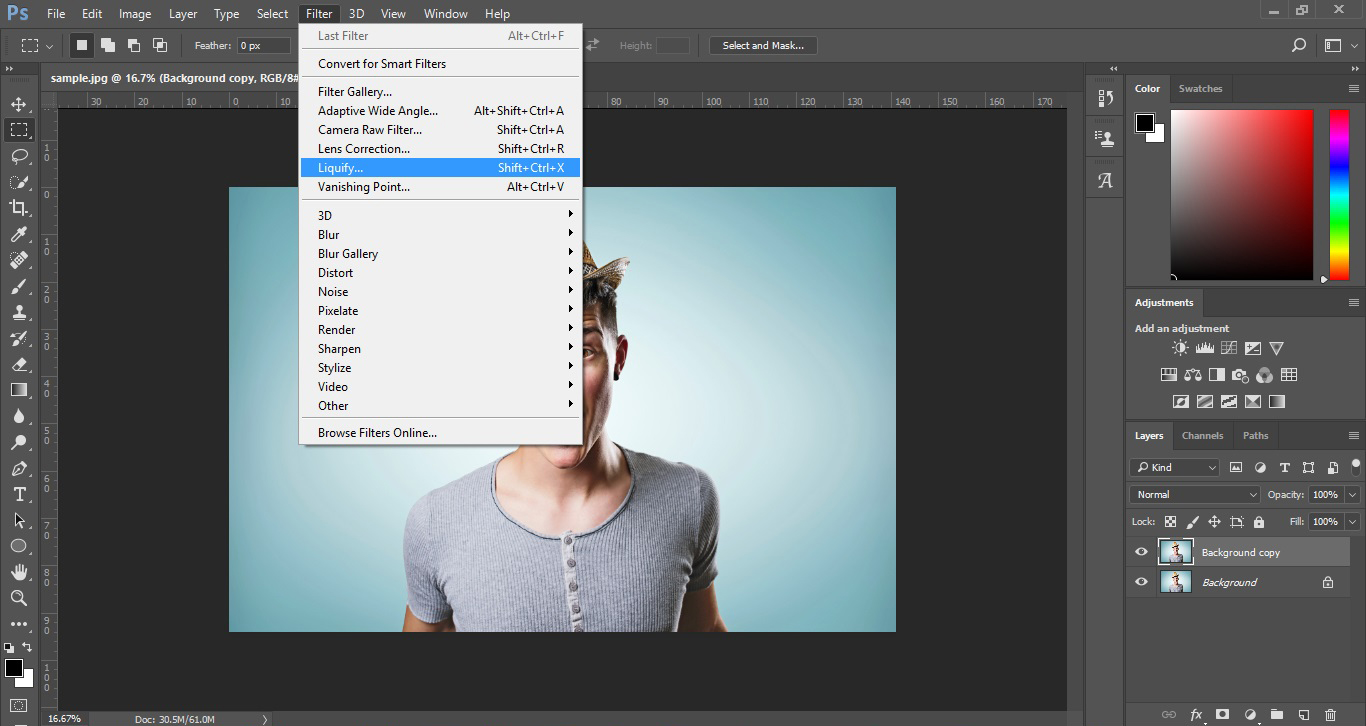
Step 2 : Duplicate the background layer

Duplicating the background layer makes you and your document always in a safe zone in which you can retrieve the original document at any time. After that navigate to Filter->liquify.
Step 3 : Start altering the facial features. First go for eyes.
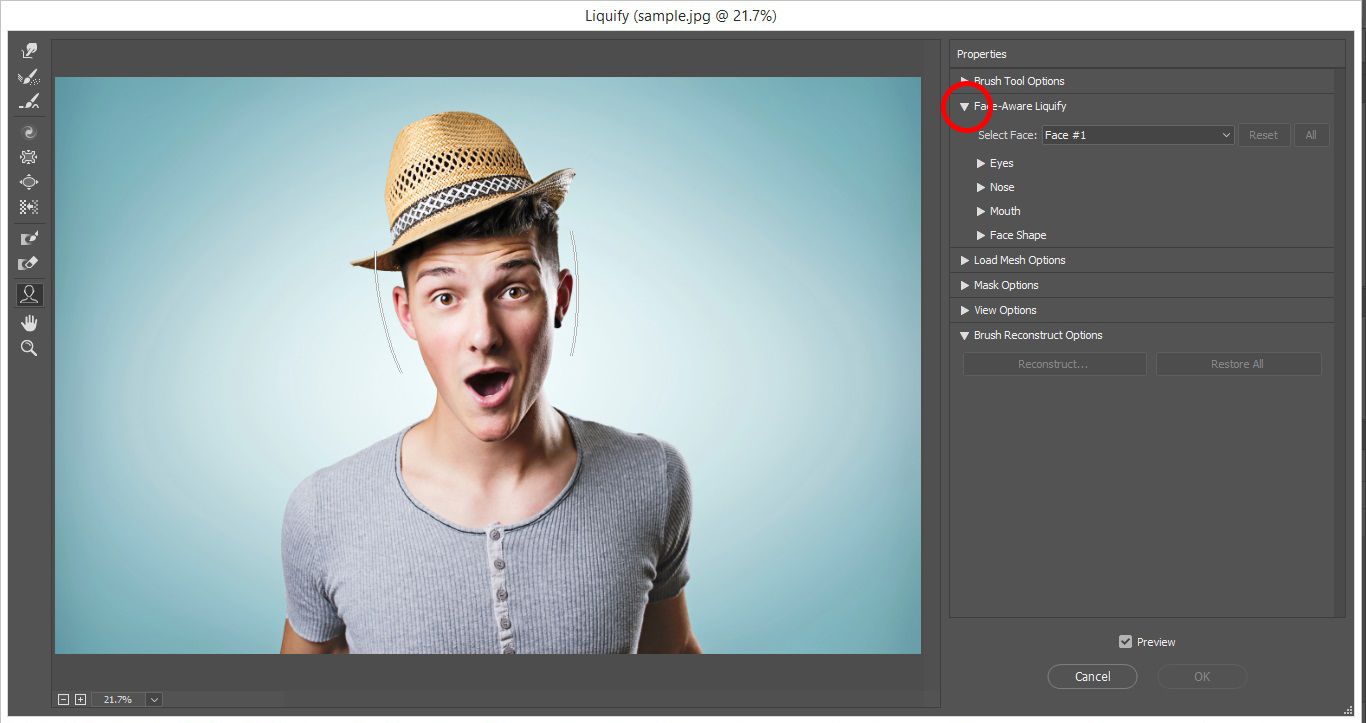
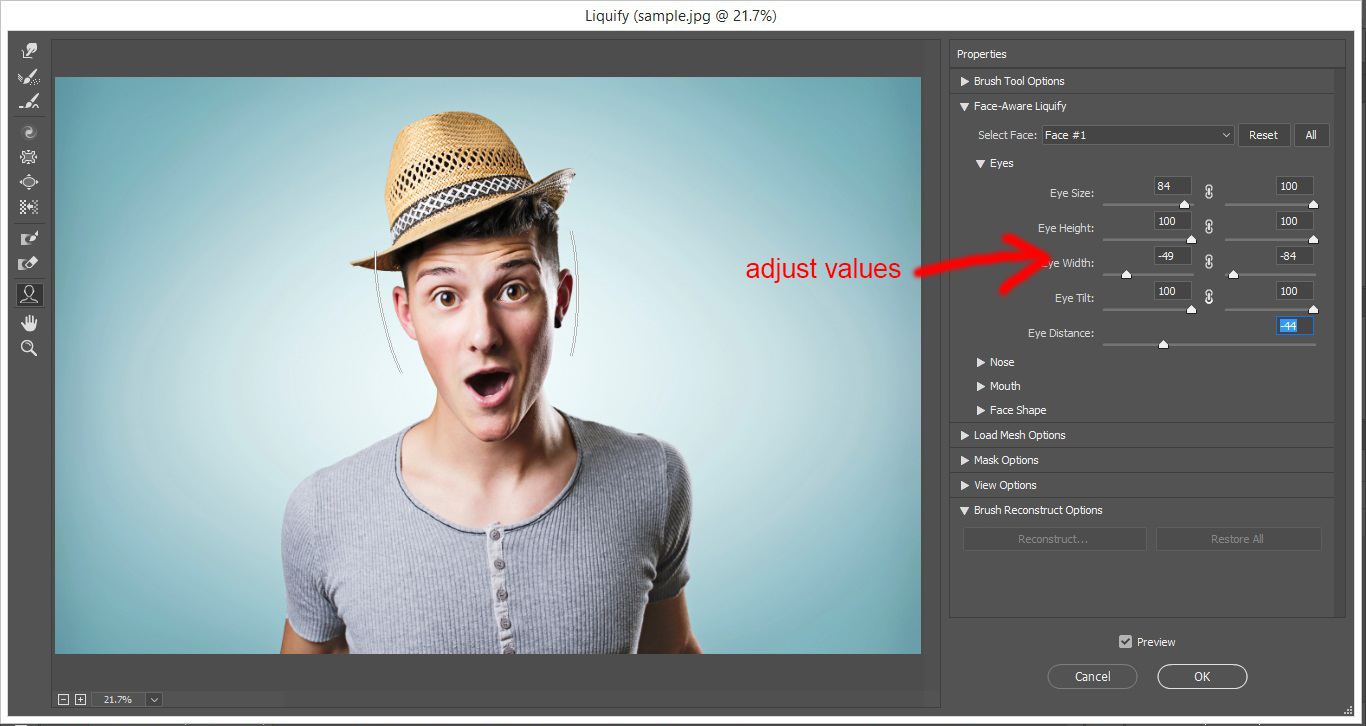
Choose face aware liquify drop down option there you will see the eyes drop down. The main advantage of face aware liquefy tool is that it will detect the face and its features automatically. Only thing that we need to proceed is to adjust the sliders. Here I adjusted the values according to my imagination of result and the source image I used. Always keep in mind that these values may vary according to your source image and result that you are demanding after altering.
Step 4 : Exaggerate the features like Nose, Mouth, Face Shape
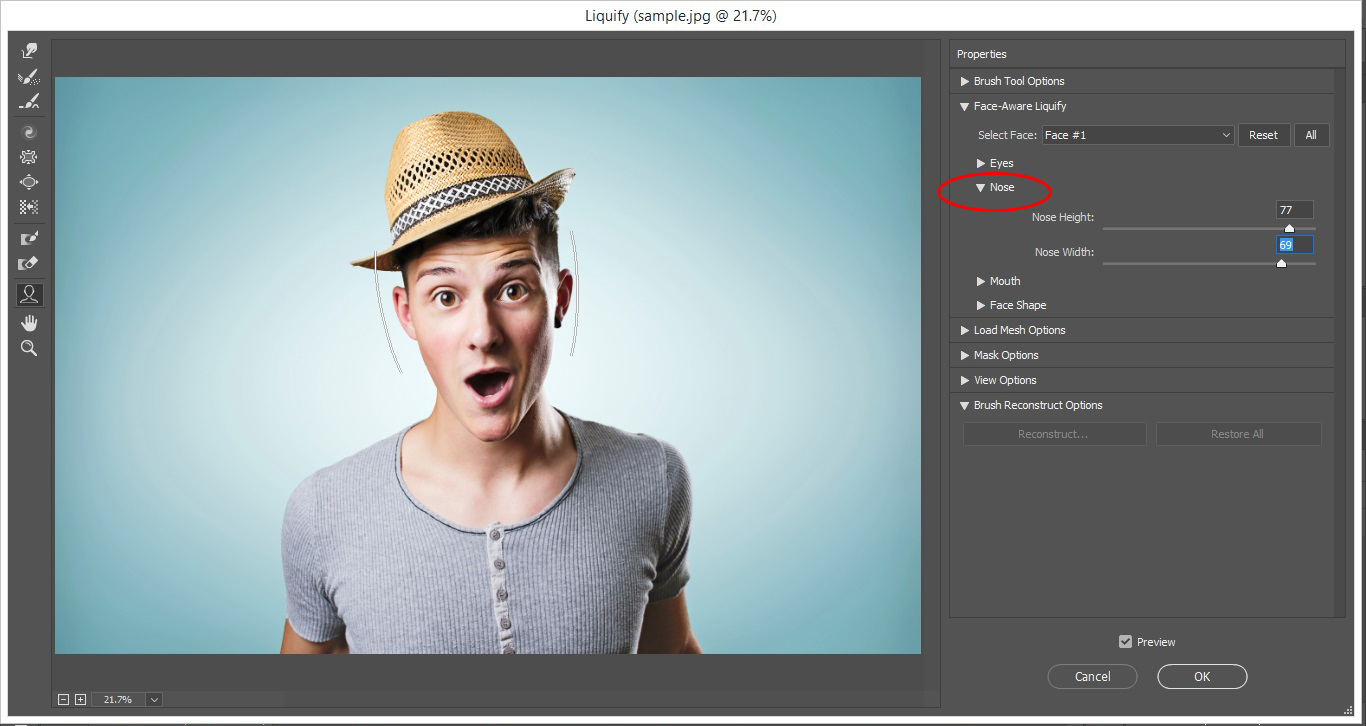
Adjust values for Nose
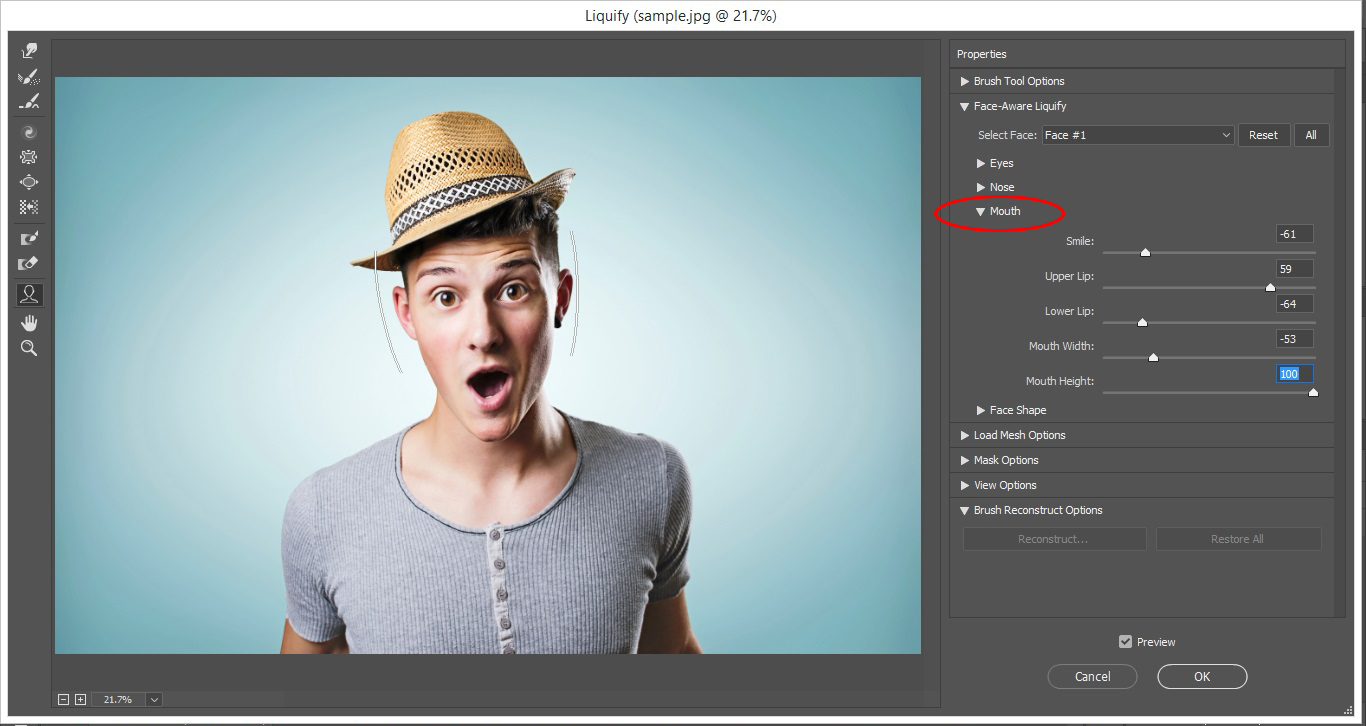
Navigate to mouth drop down and adjust its values.
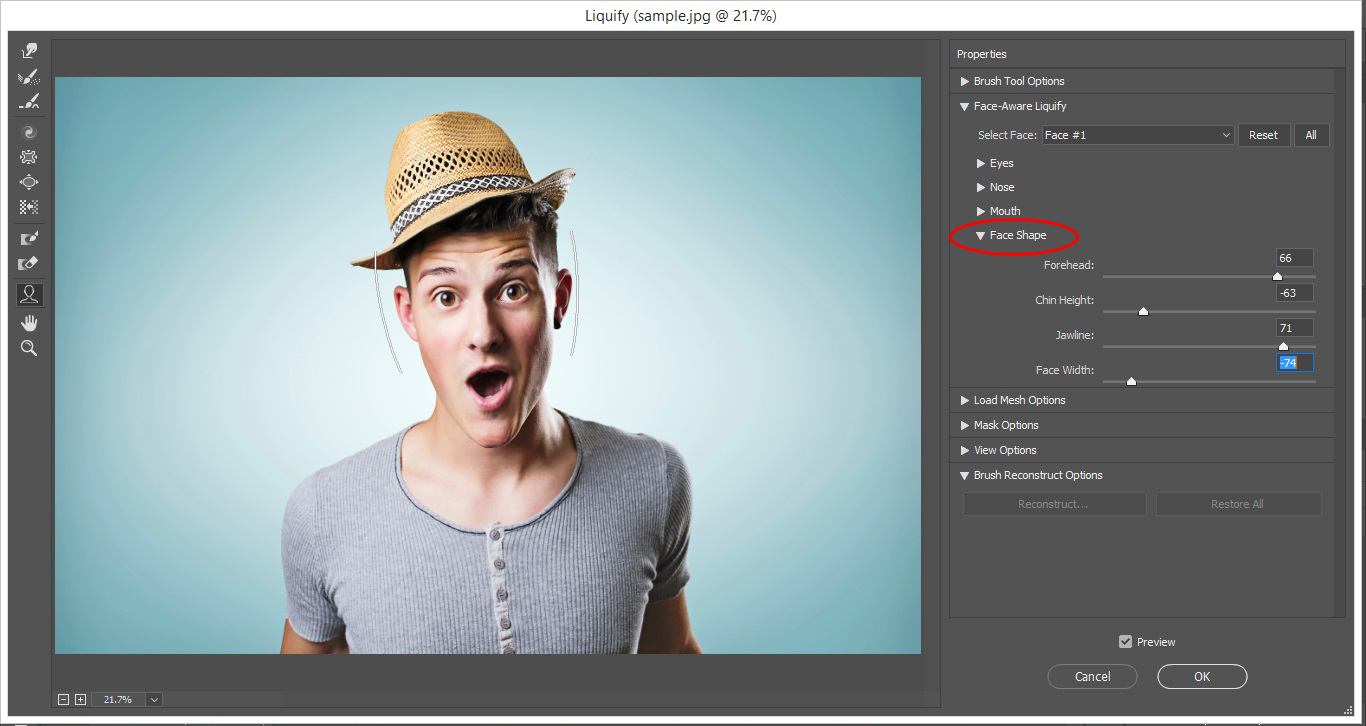
Similarly update the values for Face Shape
The image that I chosen was clearly exhibiting a detailed expression with bulged eyes and opened mouth. It was clear, he is in a surprised mood. Similar to the eyes, we’ve done distortion for the features like nose, mouth and face shape. Point we have to keep in mind is to analyze the source image and its features as an important task. If we want to adjust manually the features of the subjects then simply navigate to the Face Tool in the tool bar on the left hand side and move over to the area of the face that we want to adjust. Now we are able to click on the adjustment tools and easily adjust all areas of the face. Once happy, simply click OK.

Final Result….!!!!
